1. Local Setup, Development and Testing
In this chapter, you will set up your local Backstage environment, learn how to start the application in development mode, and explore its core features.
This hands-on introduction will give you the foundation needed to customize and extend Backstage for your organization.
Prerequisites
The prerequisites can be satisfied by using Dev Containers or installing the tools on your local machine.
Warning
Some labs are not working 100% using the Dev Containers option.Option Dev Containers
Use a Container engine and VS Code . Follow the setup of this support repository: https://github.com/puzzle/backstage-techlab-devcontainer
Windows and WSL
On Windows, Dev Containers run via WSL2. If the container has no write permissions, this is usually caused by a mismatch between the Windows host filesystem and the Linux user inside the container.
1. Move your project into the WSL2 filesystem (recommended)
If your project is located on the Windows filesystem (C:\ / /mnt/c/), permission conflicts are common. Clone or move the project directly into the WSL2 filesystem (e.g. ~/projects/my-project) and open the Dev Container from there in VS Code: code .
Verify it works by running in the container terminal:
touch test.txt
If the file is created without error, the move was successful. If not, got to next section.
No write permissions
Fix ownership inside the container. Open the terminal inside the Dev Container and transfer ownership of the workspace directory to your current user:
sudo chown -R $(whoami) /workspace
Option local installation
Ensure you have the following installed on your local machine:
- Node.js: Version 24 (Recommendation: nvm)
- Package Manager: Yarn
- Source Control: Git
- Container: Docker or Podman
Note
You can verify your Node.js version withnode --version. If you need to install or update Node.js, we recommend using nvm
for easy version management.Task 1.1: Create a New Backstage App
Backstage provides a CLI tool to scaffold a new application quickly. Let’s create your first Backstage instance.
First create a folder for the techlab inside your workspaces folder or in a temporary directory.
Run the following command to create a new Backstage app:
npx -y @backstage/create-app@0.9.1
When prompted, enter a name for your app (my-backstage-app).
Note
The creation process may take several minutes as it downloads dependencies and sets up the project structure.The output should look similar to:
  ...
  copying       index.ts ✔

 Moving to final location:
  moving        my-backstage-app ✔
  fetching      yarn.lock seed ✔
  init          git repository ◜
 Installing dependencies:
  init          git repository ✔
  executing     yarn install ✔
  executing     yarn tsc ✔

🥇  Successfully created my-backstage-app


 All set! Now you might want to:
  Run the app: cd my-backstage-app && yarn start
  Set up the software catalog: https://backstage.io/docs/features/software-catalog/configuration
  Add authentication: https://backstage.io/docs/auth/
After the creation process is complete, navigate into your newly created app directory.
cd my-backstage-app
Explore the project structure. You should see:
packages/app/- Frontend React applicationpackages/backend/- Backend Node.js applicationapp-config.yaml- Main configuration filecatalog-info.yaml- Catalog entity for the Backstage app itself (will be explained later)
Task 1.2: Start Backstage in Development Mode
Now let’s start Backstage locally to see it in action.
Warning
Using the Dev Containers option an additional setting is needed for the access of your Backstage app. The app is running inside the container and needs the following additional configuration:
Open the app-config.yaml file in your editor and add the listen: host: 0.0.0.0 configuration at the app level. It should be like this:
app:
  title: Scaffolded Backstage App
  baseUrl: http://localhost:3000
  listen:
    host: 0.0.0.0
Start both the frontend and backend in development mode with one command:
yarn start
This command will:
- Start the backend on
http://localhost:7007 - Start the frontend on
http://localhost:3000 - Enable hot-reloading for development
If your browser did not open a tab, navigate to http://localhost:3000
This should show the home page of your newly created Backstage application!
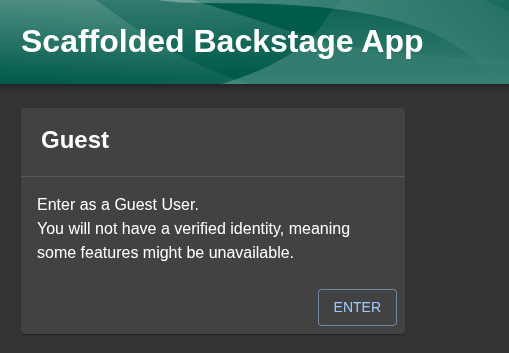
Click on the ENTER button.
You may see a warning message like:
You are currently using the legacy guest token...
Note
This warning is expected for local development. Backstage uses a guest authentication mode by default, which is fine for development purposes. In production, you would configure proper authentication (OAuth, SAML, etc.).
You can safely ignore this warning for now.
Task 1.2.1: Explore the Default Interface
The default installation includes example entities to help you understand how Backstage organizes information.
Take a few minutes to explore the default Backstage interface.
Use the Left-Side vertical navigation to check out your Backstage instance with it’s example content:
- Search: Try to search for any content
- Home: Check the home page with welcome message and infos
- Catalog: See the landing page and the catalog main page
- Create: Look at the “Create” section (we’ll use this later for templates)
- APIs: Check out the APIs section
- Catalog Graph: Additional Catalog Graph view
- Docs: Explore the TechDocs section
- Register Existing Component: Manual registration of components
Now you should have a first insight of the basic Backstage functionality.
Task 1.3: Understand the Configuration
Open the app-config.yaml file in your editor. This is the heart of your Backstage configuration.
Key sections to note:
app:
  title: Scaffolded Backstage App #(1)
  baseUrl: http://localhost:3000

organization:
  name: My Company #(2)

backend:
  baseUrl: http://localhost:7007 #(3)
  listen:
    port: 7007

catalog: #(4)
  import:
    entityFilename: catalog-info.yaml
  rules:
    - allow: [Component, System, API, Resource, Location, Group, User]
Explanation:
app.title: The name displayed in the browser taborganization.name: Your company / organization name displayed in the UI.backend.baseUrl: Where the backend API is runningcatalog: Configuration for the software catalog
Task 1.3.1: Customize Your Backstage Instance
Let’s make a simple customization to make this instance your own.
Edit app-config.yaml and change the app title:
app:
  title: Your Company Developer Portal
Also update the organization name:
organization:
  name: Your Company Name
Save the file.
Thanks to hot-reloading, you should see the changes reflected in your browser within seconds!
Task 1.4: Run Tests
Unit Tests
Backstage comes with a jest testing setup out of the box.
Note
Run the tests in a new terminal inside thebackstage-techlab folder or stop your Backstage by pressing CTRL+c on your keyboard.Start the test suite:
yarn test
You should see a list with all available options.
No tests found related to files changed since last commit.
Press `a` to run all tests, or run Jest with `--watchAll`.

Watch Usage
 › Press a to run all tests.
 › Press f to run only failed tests.
 › Press p to filter by a filename regex pattern.
 › Press t to filter by a test name regex pattern.
 › Press q to quit watch mode.
 › Press Enter to trigger a test run.
Press a to run all tests and see, that all pass.
 PASS   app  packages/app/src/App.test.tsx
  App
    ✓ should render (33 ms)

Test Suites: 1 passed, 1 total
Tests:       1 passed, 1 total
Snapshots:   0 total
Time:        2.822 s, estimated 6 s
Ran all test suites.
For the moment there’s just a basic test to check that the setup is working.
Note
Pressq on your keyboard to exit the test suite.To check the test coverage run:
yarn test:all
You will notice, that there are some lines of code not covered by any tests.
E2E Tests
For end-to-end tests a playwright setup is ready to use.
It will start your Backstage instance and run the tests against it.
yarn test:e2e
Note
Depending on your setup you might get a error running the E2E tests.
You probably need to install browsers first: e.g. yarn playwright install chrome
E2e test are not working using the Dev Containers option.
Task 1.5: Build for Production
While we’re developing locally, it’s useful to understand how to build Backstage for production.
Create a production build:
yarn build:all
This command performs several build steps:
- TypeScript Compilation: Converts all TypeScript code (
.ts,.tsx) to JavaScript - Frontend Bundling: Creates an optimized production bundle of the React application
- Minifies JavaScript and CSS
- Optimizes assets and images
- Creates static files ready for deployment
- Backend Bundling: Packages the Node.js backend application
- Bundles all backend code and dependencies
- Prepares the backend for deployment
- Type Checking: Validates TypeScript types across the entire codebase
Note
The production build artifacts are created in the dist/ directories of each package (packages/app/dist and packages/backend/dist).
These optimized builds are what you would deploy to production. For this techlab, we won’t deploy them, but it’s important to understand the build process.
Summary
In this chapter, you:
- ✅ Created a new Backstage application
- ✅ Explored the default interface
- ✅ Made your first customization
- ✅ Ran tests and created a production build
Your local Backstage environment is now ready for the next steps!
In the next chapters, you’ll learn how to populate the catalog, create templates, and add plugins to make Backstage truly powerful for your organization.